How to Use Oil Pastels: A Beginner's Guide
Oil pastels look like crayons but behave like nothing else. They're creamy, intensely pigmented, and surprisingly versatile once you understand how they work.
If you've picked up a set and wondered what to do with them—or you're considering buying your first box—this guide covers everything you need to get started.
What Are Oil Pastels, Exactly?
Oil pastels are sticks of pigment bound with non-drying oil and wax. Unlike soft pastels (which are chalky and dusty) or crayons (which are mostly wax), oil pastels have a buttery consistency that lets you build up layers, blend colors, and create rich, painterly effects.
Oil Pastels vs. Soft Pastels
These get confused constantly, but they're very different materials:
| Feature | Oil Pastels | Soft Pastels |
|---|---|---|
| Texture | Creamy, waxy | Chalky, powdery |
| Blending | Smooth, smudgy | Dusty, needs fixative |
| Layering | Builds up thickly | Can clog paper tooth |
| Cleanup | Needs solvent | Wipes off easily |
| Finish | Slightly glossy | Matte, velvety |
Oil pastels don't require fixative spray because they don't create dust. But they also never fully dry, which means finished pieces can smudge if rubbed.
Oil Pastels vs. Crayons
Crayons are mostly wax with less pigment. Oil pastels have more pigment and more oil, making them:
- More vibrant and saturated
- Easier to blend
- Capable of layering
- Softer to apply
Don't confuse them at the art store—they look similar but perform completely differently.
Getting Started: What You Need
You don't need much to begin with oil pastels. Here's the essentials:
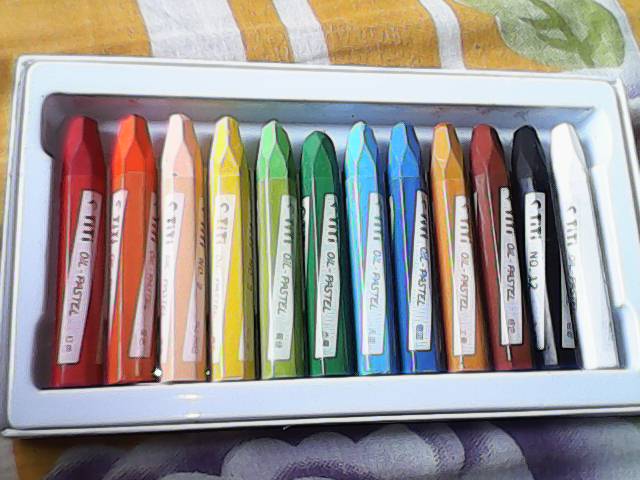
Oil Pastels
For beginners, a 24-color set provides enough range without overwhelming you. Quality matters more than quantity—12 good pastels beat 72 cheap ones.
Budget-friendly options:
- Mungyo Gallery Soft Oil Pastels (~$15 for 24)
- Pentel Arts Oil Pastels (~$10 for 25)
- Cray-Pas Expressionist (~$20 for 25)
Worth the upgrade:
- Sennelier Oil Pastels (~$45 for 24)—noticeably creamier
- Holbein Artists' Oil Pastels (~$60 for 24)—professional quality
Start cheap to see if you like the medium. Upgrade once you know what colors you actually reach for.
Paper
Oil pastels work on almost any paper, but some surfaces work better than others.
Good choices:
- Canson Mi-Teintes - Textured surface grabs the pastel well
- Strathmore 400 Series Drawing - Affordable and sturdy
- Pastelmat - Premium surface with excellent tooth
- Mixed media paper - Heavier weight handles layering
Paper weight matters. Lightweight paper buckles under heavy application. Look for at least 90 lb (150 gsm) weight.
Toned paper (gray, tan, cream) can be more forgiving than white. You don't have to cover every inch of the surface.
Other Supplies
- Paper towels or rags - For wiping pastels and fingers
- Baby oil or mineral oil - For blending (optional but useful)
- Cotton swabs or blending stumps - For detailed blending
- Palette knife - For scraping and sgraffito techniques
That's it. You can start with just pastels and paper.
Basic Techniques
Holding the Pastel
You have options:
Like a pencil - For controlled lines and details. Use the tip.
On its side - For broad strokes and filling large areas. Use the length of the stick.
Unwrapped - Peel the paper wrapper off completely for maximum contact. Some artists prefer this for loose, expressive work.
Most beginners grip too tightly. Relax your hand. The pastel should glide, not scrape.
Applying Color
Light pressure creates a thinner layer that shows paper texture.
Heavy pressure creates thick, opaque coverage.
Layering light over dark is tricky with oil pastels because darker colors can muddy lighter ones. Plan your darks first or use white underneath light colors.
Start with light pressure. You can always add more, but you can't easily remove what's there.
Blending
Blending is where oil pastels shine. You have several methods:
Finger blending - The most direct approach. Your body heat softens the pastel. Works great for soft transitions. Keep paper towels handy—your fingers will get colorful.
Cotton swabs - Good for small areas and controlled blending.
Blending stumps (tortillons) - Paper stumps that pick up and spread color. Useful for mid-sized areas.
Oil blending - Dip a brush in baby oil or odorless mineral spirits and brush over the pastel. Creates smooth, almost painterly effects. Use sparingly—too much oil makes the paper translucent.
Layering without blending - You don't have to blend everything. Visible strokes create texture and energy.
Building Layers
Oil pastels let you layer colors in ways other dry media can't match.
Layer 1: Block in basic shapes and mid-tones.
Layer 2: Add shadows and darker values.
Layer 3: Build up highlights and brightest colors.
Layer 4 (optional): Refine details, punch up contrasts.
The pastel builds up with each layer. Eventually, the paper surface fills with pigment and won't accept more. This is called "tooth saturation." When it happens, you can:
- Scrape back with a palette knife
- Move to a different area
- Accept that section as finished
Color Mixing
You mix oil pastel colors directly on the paper, not on a palette.
Optical mixing: Apply two colors side by side. From a distance, the eye blends them.
Physical mixing: Layer one color over another. The colors physically combine.
Tip: Lighter colors don't cover dark ones well. If you need a light area, apply it first or leave the paper bare.
Advanced Techniques
Once you're comfortable with basics, try these:
Sgraffito
Scratch through layers to reveal colors underneath.
- Apply a layer of one color
- Cover it with another color
- Use a palette knife, toothpick, or other tool to scratch patterns through the top layer
Creates interesting textures and details. Works especially well with contrasting colors.
Oil Wash
Use mineral spirits or baby oil to turn oil pastels into a painterly medium.
- Apply pastel to paper
- Dip a brush in solvent
- Brush over the pastel to spread and blend
Creates watercolor-like effects. Be careful—solvents can make paper buckle or become translucent.
Impasto Effects
Build up thick layers of pastel for a textured, almost sculptural surface.
Heavy application with multiple layers creates raised areas that catch light. Some artists use palette knives to shape the pastel directly.
Underpainting
Start with a wash of watercolor or acrylic, let it dry, then work oil pastels over top.
The painted layer creates an understructure that shows through in thin areas. Good for establishing values before adding pastel texture.
Resist Technique
Oil pastels resist water-based media.
- Draw with oil pastels
- Paint over with watercolor
- The watercolor beads up and pulls away from the pastel areas
Creates interesting effects for skies, textures, or abstract work.
Common Mistakes Beginners Make
Starting Too Dark
It's hard to go lighter over dark with oil pastels. Map out your lightest areas first, or work light to dark.
Over-Blending
Not everything needs to be smoothly blended. Visible strokes add life. A piece that's entirely blended can look mushy and flat.
Using Too Many Colors
Start with a limited palette—maybe 5-6 colors. This forces you to mix and creates color harmony. Beginners often use every color in the box and end up with muddy chaos.
Pressing Too Hard Too Soon
Heavy pressure fills the paper tooth quickly. Start lighter and build up.
Ignoring Value
Color is exciting, but value (light and dark) creates structure. Squint at your reference to see values. Make sure you have a full range from dark to light.
Subject Ideas for Practice
Fruit and Vegetables
Classic for a reason. Simple shapes, interesting colors, readily available. Cut an apple in half and draw the inside—it's more interesting than the outside.
Sunsets and Skies
Oil pastels excel at smooth gradients. Practice blending from warm oranges to cool purples.
Flowers
Strong shapes, vibrant colors, forgiving of imprecision. Nobody knows exactly what your flower is supposed to look like.
Abstract Color Studies
Just play. Fill a page with color experiments. Try different blending methods. See what the pastels can do without worrying about representing anything.
Simple Still Life
A mug, a book, a piece of fruit. Practice seeing values and rendering basic forms.
Taking Care of Your Work
Oil pastels never fully cure. A finished piece can smudge months or years later if rubbed.
Protecting Finished Pieces
Fixative spray can help but won't make the surface completely touchable. Multiple light coats work better than one heavy coat. Note: some fixatives darken colors or add unwanted shine.
Glassine paper - Acid-free tissue paper placed over the surface for storage.
Framing under glass - The best protection. Leave a mat or spacer so the glass doesn't touch the pastel surface.
Storing Your Pastels
Oil pastels can soften in heat and harden in cold. Store at room temperature.
Keep them in their original tray or a compartmented storage container so colors don't rub against each other.
If pastels get dirty from other colors, wipe them with a paper towel.
Oil Pastel Classes
If you want structured instruction, oil pastel classes can accelerate your learning. You'll get:
- Feedback on your technique
- Access to quality materials to try
- Structured projects that build skills
- A reason to actually practice
Look for classes specifically labeled "oil pastel" or "pastel drawing." General drawing classes sometimes include pastel work.
Some studios offer one-day workshops focused on a specific technique or subject. These are great for trying the medium without a multi-week commitment.
Is Oil Pastel Right for You?
Oil pastels are a good fit if you:
- Like bold, vibrant color
- Enjoy hands-on, tactile processes
- Want something between drawing and painting
- Don't mind getting your hands dirty
- Appreciate forgiving media (easy to layer and adjust)
They might not be for you if you:
- Need precise, detailed lines
- Want a completely dry, finished surface
- Prefer clean, controlled processes
- Have sensitivity to waxy textures
The only way to really know is to try them. A basic set costs less than dinner out.
FAQ
Can I use oil pastels with other media?
Yes. They work well over acrylic underpainting and can be combined with collage. They don't mix with watercolor or soft pastels (different chemistry), but you can use them in the same piece in separate areas.
How do I clean oil pastels off my hands?
Baby oil or cooking oil breaks down the oil in the pastels. Follow with soap and water. Regular handwashing alone usually isn't enough.
Do oil pastels work on canvas?
Yes, but prime the canvas with gesso first. Raw canvas can absorb the oil over time, leaving dried-out pigment.
Why are my pastels hard and scratchy?
Could be low-quality pastels, old pastels, or cold temperature. Try warming them briefly in your hands. If they're student-grade pastels, they may just have more wax and less oil.
How long do oil pastels last?
Unused pastels can last for years if stored properly. They don't dry out like markers or paints. Used pastels work until they're physically worn down to nothing.
Can kids use oil pastels?
Yes. They're non-toxic and easier to control than soft pastels. The mess is manageable with paper towels. Just supervise very young children who might try to taste them.